Revo Uninstaller Pro automatically records all deleted Registry items during all Uninstall procedures and the Autorun Manager, but not for files and folders. This is because the backups can be large in size, and this may not be practical.
TIP: To backup deleted files & folders, amend the setting (Options -> Uninstaller-> Delete files and folders to Backup folder).
TIP: You can delete all or just some of the backed up data if you need to free up disk space.
NOTE: By default, Revo Uninstaller Pro also creates a Windows Restore Point at the start of any uninstall operation (before deleting any data).
Backups are created for the same reason that you should regularly back up your personal data, and why your Windows system also creates daily Restore Points: To help you resolve a problem. The vast majority of problems can usually be overcome by performing a Windows Restore operation. Backup Manager is there for the very rare occasion when Windows Restore doesn’t help.
Imagine, for example, that Revo Uninstaller Pro deleted a Registry key of another program by “error”, or perhaps you mistakenly selected a key by error when performing an Uninstall operation. Now is the time to use Backup Manager. Just open the relevant backup and restore the key(s) – it takes very little time and is very simple.
When restoring backed up items, you can choose to restore all or just some of the deleted data. To start Backup Manager click its button in the Tools group in the lower part of the Commands Panel.
The main window details all locally stored backups grouped by creation date, then sequenced by time. Each backup details the operation during which the item was backed up, it’s size, and the number of items copied. Click left on any column header to change the sort sequence. Click right to view a context menu offering visual customization.
Click right on any backup to obtain the options to Restore/Custom Restore/Delete.
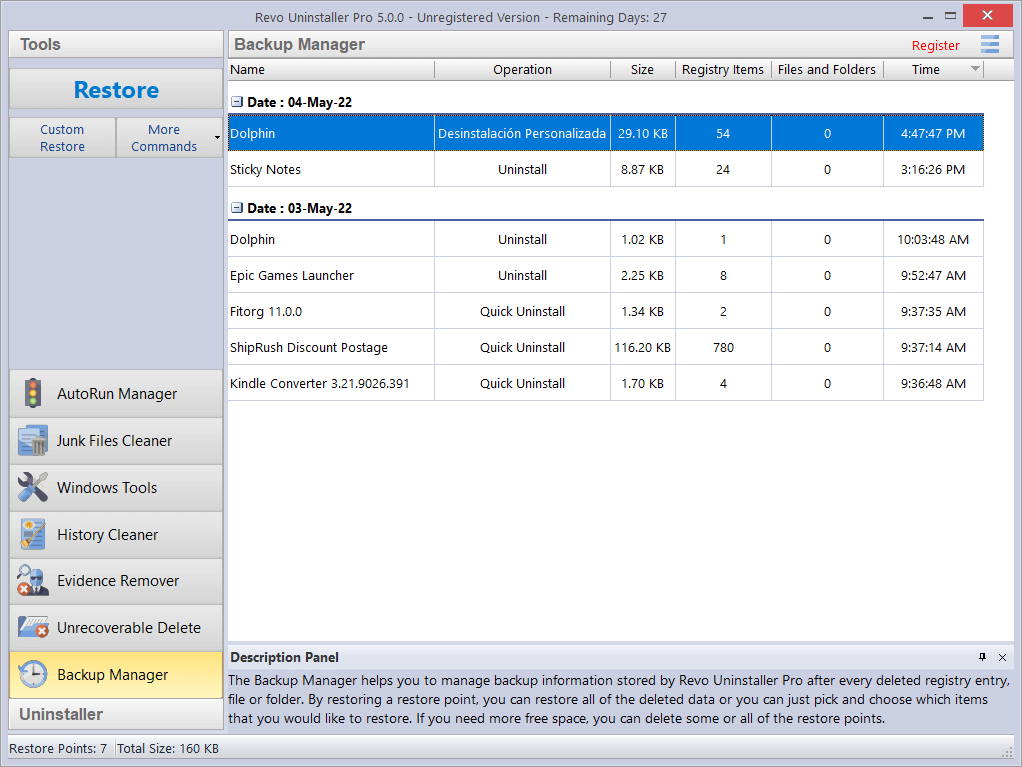
Click on More Commands to obtain the options to Delete/Delete by Time/Delete All/Windows Restore System.
- Restore – restores all backed up items; there is a progress bar, and when the restoration completes, the window closes automatically.
- Custom Restore – allows you selectively restore only specific Registry entries, files and/or folders. This is done in one or two steps, depending on whether files and folders are also backed up by the Backup Manager. In the first step you will be able to restore Registry entries, and in the second one – files and/or folders (if any). Simply check the items you want to restore, and click the Restore button. You can also click the Select All button, and click Restore.
- Delete – removes the selected backup, and moves it to the Recycle Bin.
- Delete by Time – opens a window that allows you to delete multiple backups, based on their creation date; you can delete all backups in a specified period of time, or all backups before a specified date.
- Delete All – removes all backups from the list, and moves them to the Recycle Bin. Since all backups are deleted to the Recycle Bin, if you want to free up disk space, you will need to empty the Recycle Bin.
- Windows Restore System – opens a shortcut link to Windows Restore