- Extract and activate Revo Registry Cleaner Pro Portable
- Install Revo Registry Cleaner Free
- Install Revo Registry Cleaner Pro
- Activate Revo Registry Cleaner Pro
- Uninstall Revo Registry Cleaner
- Change Username in Revo Registry Cleaner Pro
- Deactivate Revo Registry Cleaner
- Update license subscription in Revo Registry Cleaner
- Delete the Revo Registry Cleaner Pro's license file
- Activate Revo Registry Cleaner by file
UNINSTALL REVO REGISTRY CLEANER PRO
There are numerous ways to accomplish this. We will describe a method that is both quick and versatile.
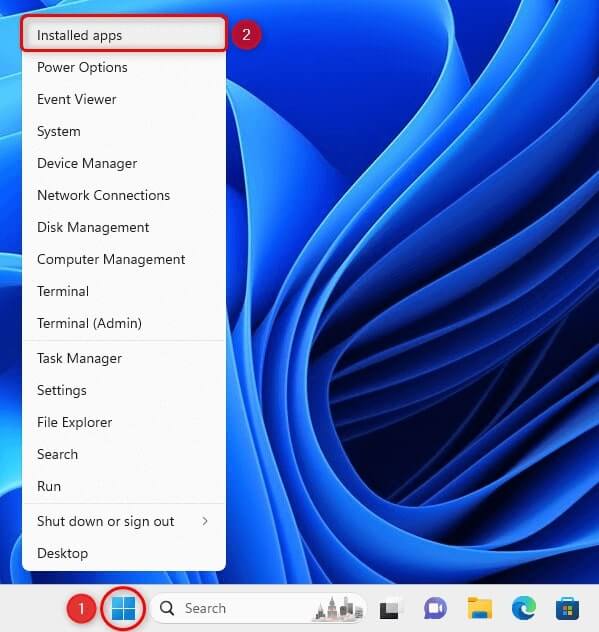
- Right click the Start button, and from the menu select Installed apps.

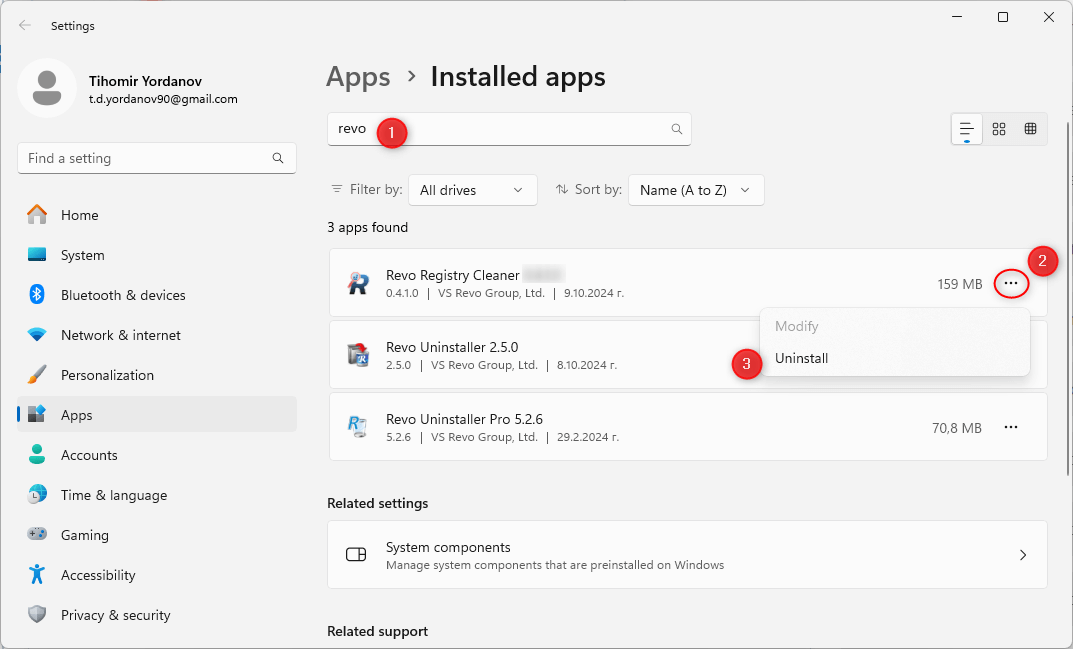
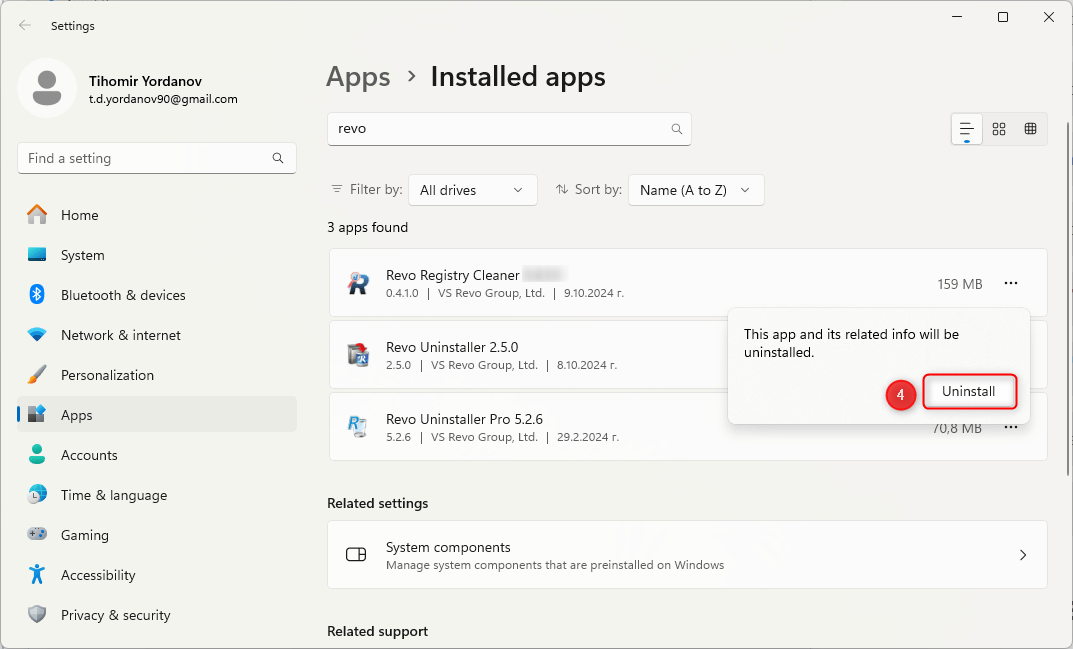
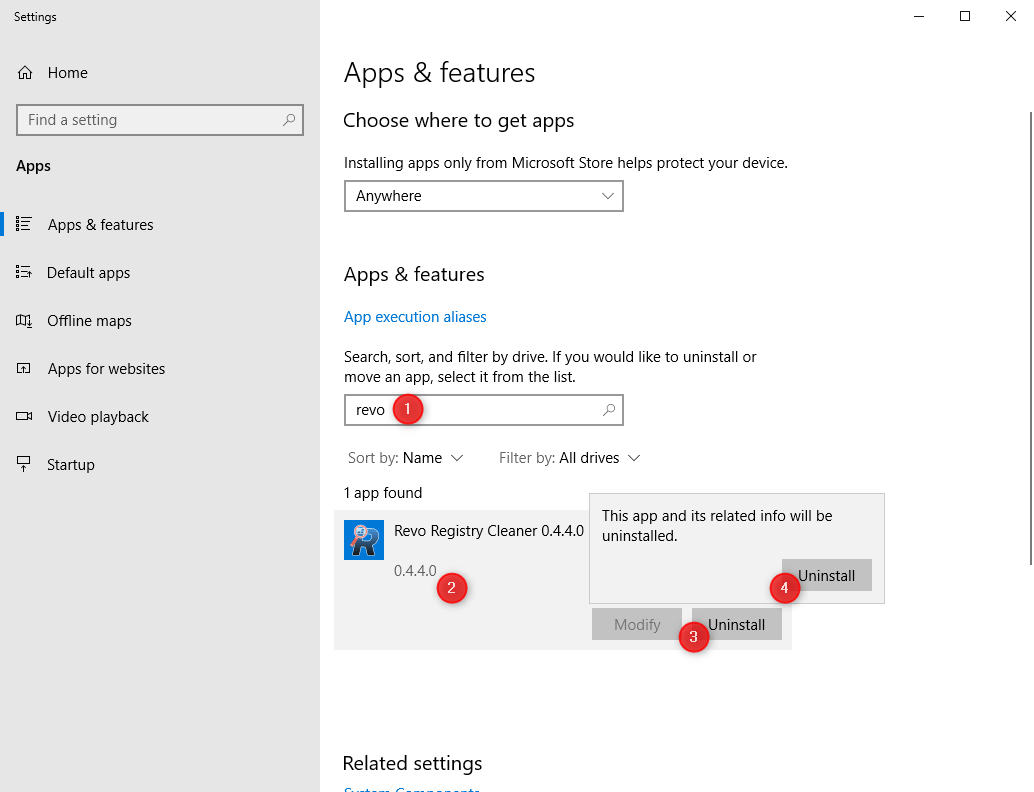
- You will see a list containing all apps and programs you have installed on your computer. You can scroll down until you find Revo Registry Cleaner Pro in the list, or you can use the search field to filter the list (as also demonstrated on the screenshot below). Once you have found Revo Registry Cleaner Pro, click the three dots on the right (…), then click Uninstall, and then Uninstall again.


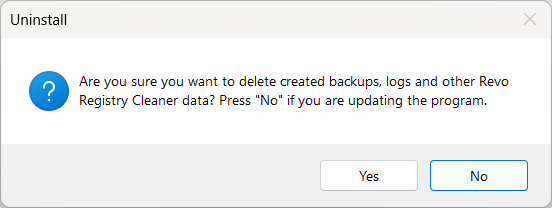
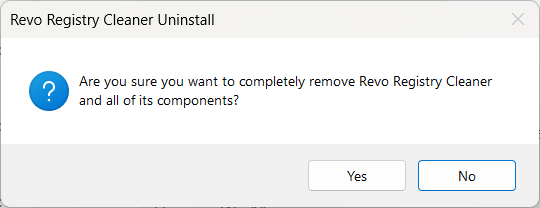
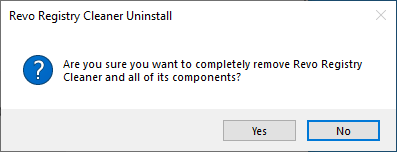
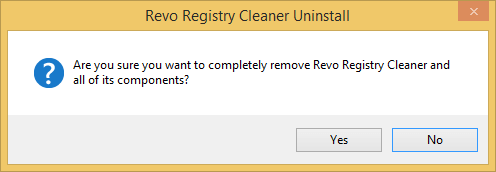
- If you are certain you wish to remove Revo Registry Cleaner Pro, click Yes. If you want to cancel the uninstallation, click No.

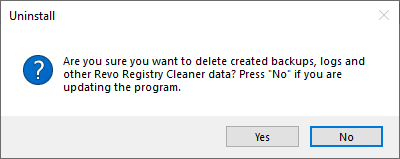
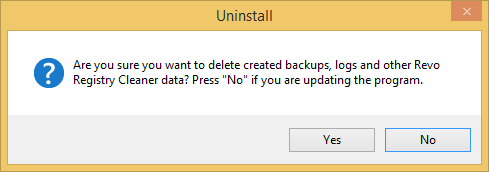
- You will be asked if you wish to delete or preserve Revo Registry Cleaner Pro’s folder in your local profile (LocalAppData). This folder contains any created trace logs, backups, and other miscellaneous data.
- If you want to uninstall Revo Registry Cleaner Pro permanently, or you want to make a complete and clean removal of it in order to troubleshoot a problem, then click Yes, which will delete the folder.
Otherwise, if you plan to install Revo Registry Cleaner Pro at a later time, or you are simply updating it, click No.

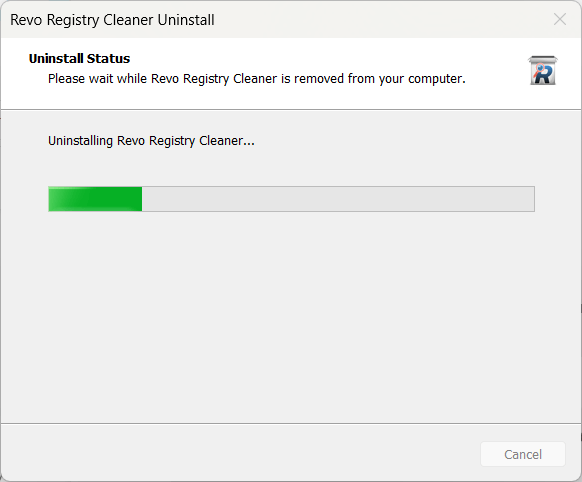
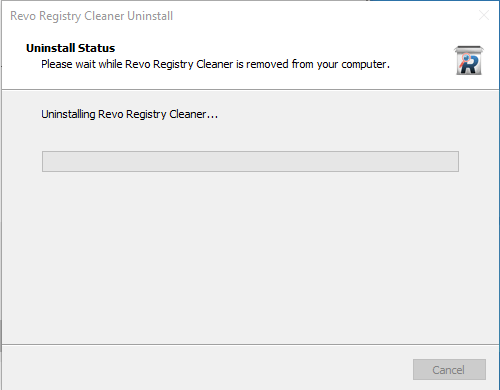
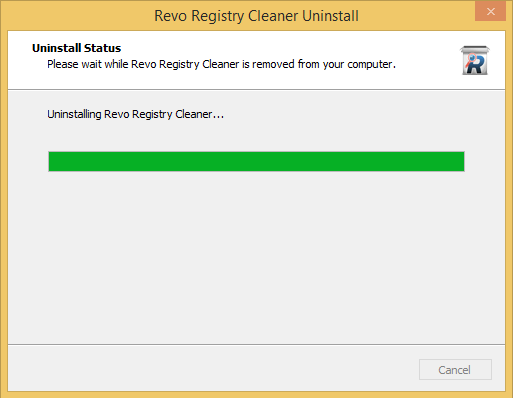
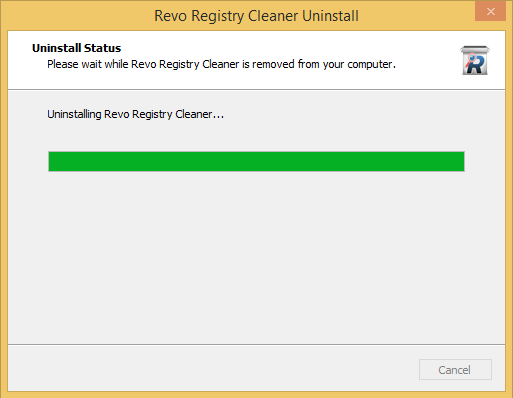
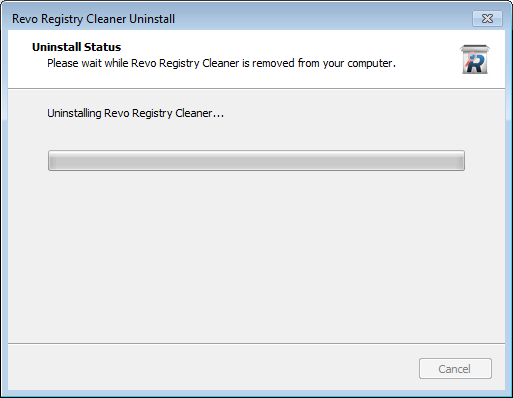
- The uninstallation will begin. It cannot be cancelled at this point.

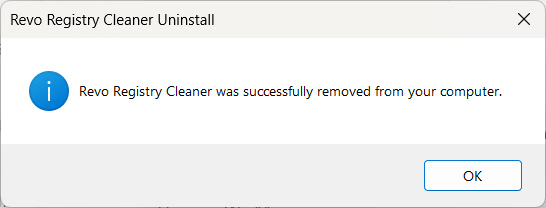
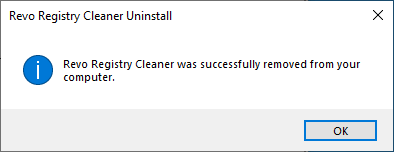
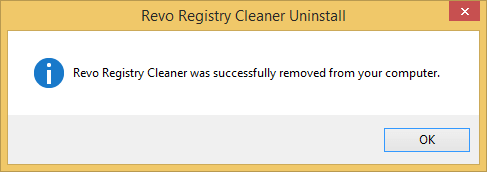
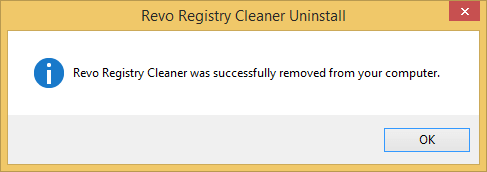
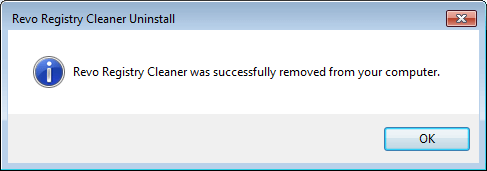
- An information message will appear after the uninstallation has been completed. Simply click OK.

To Know
A reboot of your computer may be necessary in certain cases. If it is, you will be asked at the end of the uninstallation. It is generally preferable to reboot then, however you can also decline if you wish to reboot later, or if you plan to turn off your computer, instead of rebooting.
There are numerous ways to accomplish this. We will describe a method that is both quick and versatile.
- Right click the Start button, and from the menu select Apps and Features.
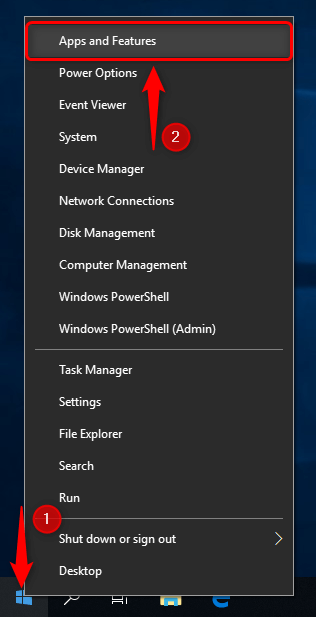
- You will see a list containing all apps and programs you have installed on your computer. You can scroll down until you find Revo Registry Cleaner Pro in the list, or you can use the search field to filter the list (as also demonstrated on the screenshot below). Once you have found Revo Registry Cleaner Pro, select it, click Uninstall, then click Uninstall again.

- If you are certain you wish to remove Revo Registry Cleaner Pro, click Yes. If you want to cancel the uninstallation, click No.

- You will be asked if you wish to delete or preserve Revo Registry Cleaner Pro’s folder in your local profile (LocalAppData). This folder contains any created trace logs, backups, and other miscellaneous data. If you want to uninstall Revo Registry Cleaner Pro permanently, or you want to make a complete and clean removal of it in order to troubleshoot a problem, then click Yes, which will delete the folder.
Otherwise, if you plan to install Revo Registry Cleaner Pro at a later time, or you are simply updating it, click No.

- The uninstallation will begin. It cannot be cancelled at this point.

- An information message will appear after the uninstallation has been completed. Simply click OK.

To Know
A reboot of your computer may be necessary in certain cases. If it is, you will be asked at the end of the uninstallation. It is generally preferable to reboot then, however you can also decline if you wish to reboot later, or if you plan to turn off your computer, instead of rebooting.
There are numerous ways to accomplish this. We will describe a method that is both quick and versatile.
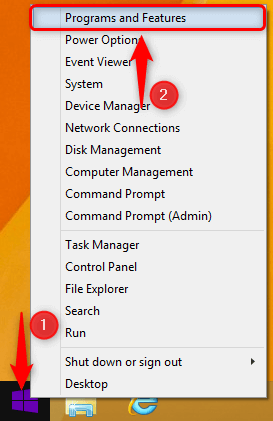
- Right click the Start button, and from the menu select Programs and Features.

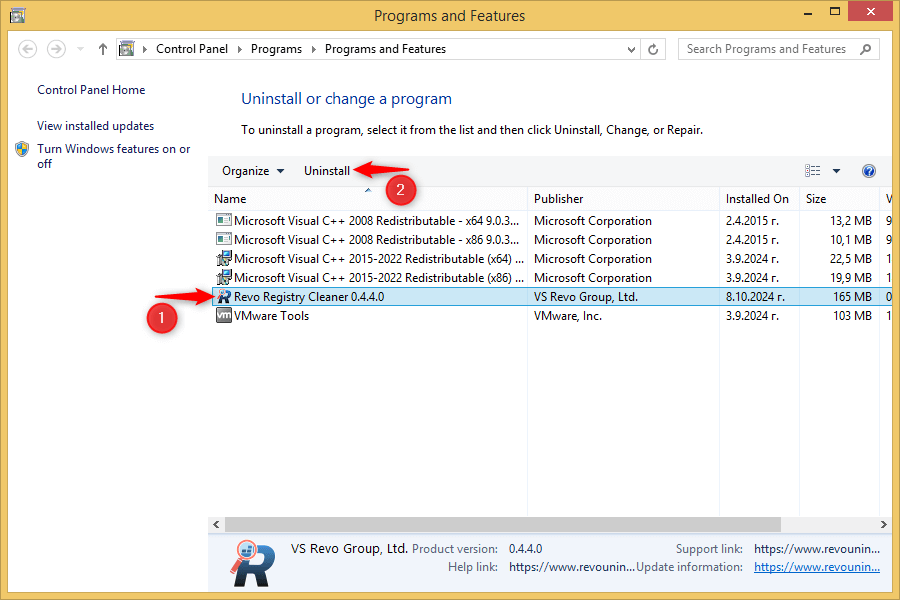
- In the list of installed programs find Revo Registry Cleaner Pro, select it, then click Uninstall.

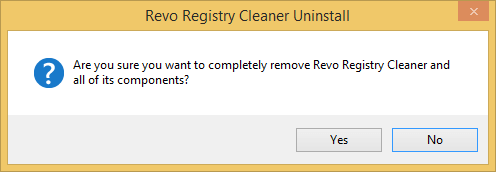
- If you are certain you wish to remove Revo Registry Cleaner Pro, click Yes. If you want to cancel the uninstallation, click No.

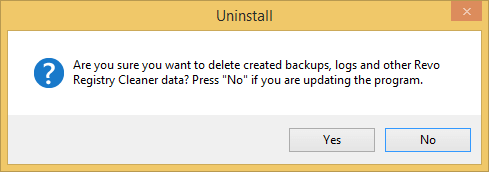
- You will be asked if you wish to delete or preserve Revo Registry Cleaner Pro’s folder in in your local profile (LocalAppData). This folder contains any created trace logs, backups, and other miscellaneous data.If you want to uninstall Revo Registry Cleaner Pro permanently, or you want to make a complete and clean removal of it in order to troubleshoot a problem, then click Yes, which will delete the folder. Otherwise, if you plan to install Revo Registry Cleaner Pro at a later time, or you are simply updating it, click No.

- Regardless which option you choose, the uninstallation will begin. It cannot be cancelled at this point.

- An information message will appear after the uninstallation has been completed. Simply click OK.

To Know
A reboot of your computer may be necessary in certain cases. If it is, you will be asked at the end of the uninstallation. It is generally preferable to reboot then, however you can also decline if you wish to reboot later, or if you plan to turn off your computer, instead of rebooting.
There are numerous ways to accomplish this. We will describe a method that is both quick and versatile.
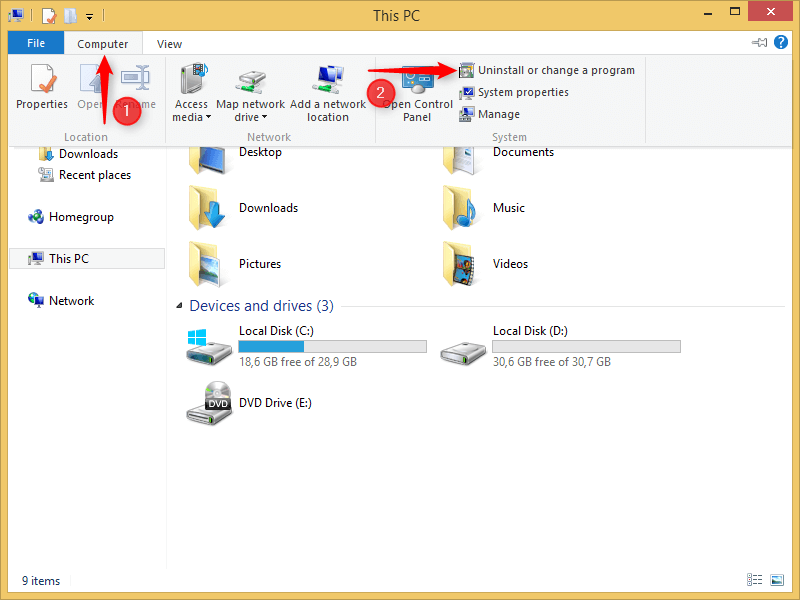
- Open Windows Explorer. One of the fastest and most universal way to do this is to press the WinKey + E on your keyboard.Click the Computer tab in the top left corner, then click Uninstall or change a program.

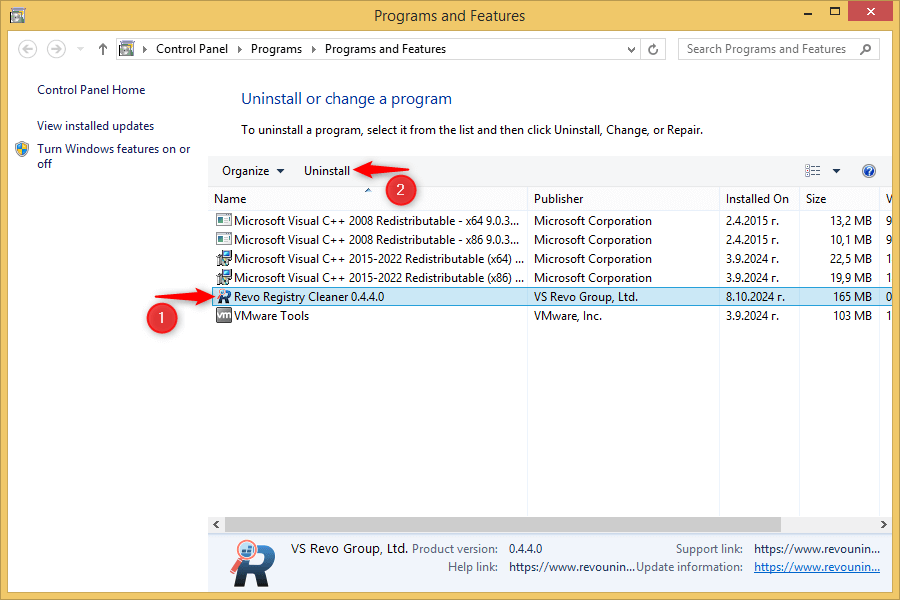
- In the list of installed programs find Revo Registry Cleaner Pro, select it, then click Uninstall.

- If you are certain you wish to remove Revo Registry Cleaner Pro, click Yes. If you want to cancel the uninstallation, click No.

- You will be asked if you wish to delete or preserve Revo Registry Cleaner Pro’s folder in your local profile (LocalAppData). This folder contains any created trace logs, backups, and other miscellaneous data.If you want to uninstall Revo Registry Cleaner Pro permanently, or you want to make a complete and clean removal of it in order to troubleshoot a problem, then click Yes, which will delete the folder.Otherwise, if you plan to install Revo Registry Cleaner Pro at a later time, or you are simply updating it, click No.

- Regardless which option you choose, the uninstallation will begin. It cannot be cancelled at this point.

- An information message will appear after the uninstallation has been completed. Simply click OK.

To Know
A reboot of your computer may be necessary in certain cases. If it is, you will be asked at the end of the uninstallation. It is generally preferable to reboot then, however you can also decline if you wish to reboot later, or if you plan to turn off your computer, instead of rebooting.
There are numerous ways to accomplish this. We will describe a method that is both quick and versatile.
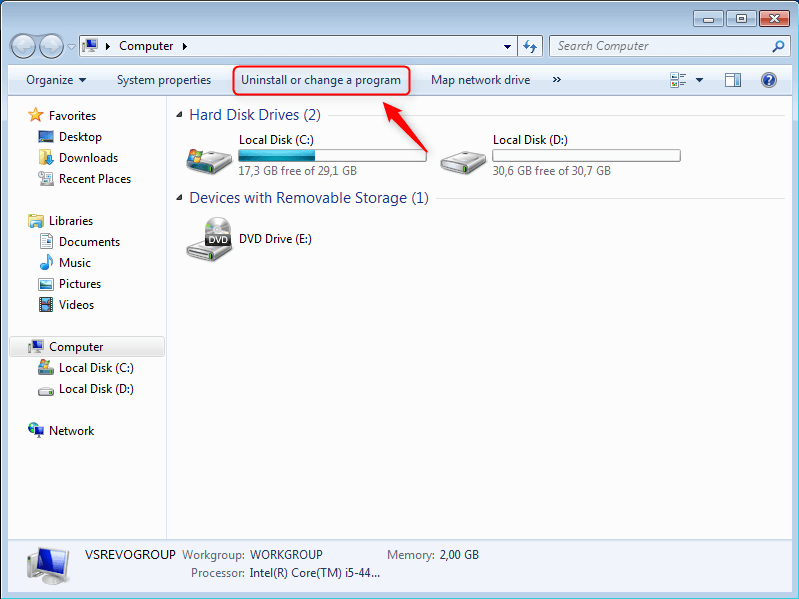
- Open Windows Explorer. One of the fastest and most universal way to do this is to press the WinKey + E on your keyboard. Click Uninstall or change a program.

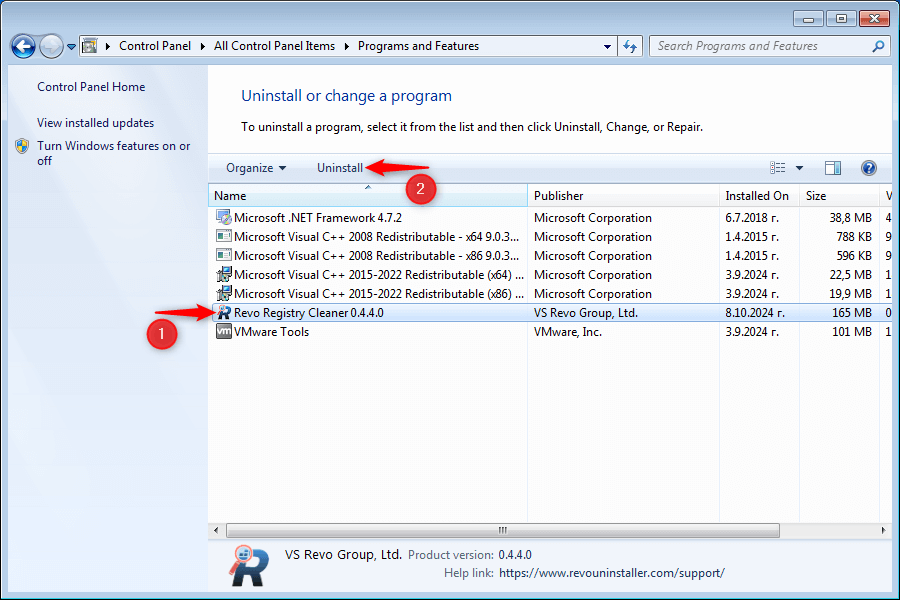
- In the list of installed programs find Revo Registry Cleaner Pro, select it, then click Uninstall.

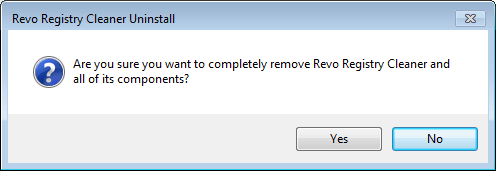
- If you are certain you wish to remove Revo Registry Cleaner Pro, click Yes. If you want to cancel the uninstallation, click No.

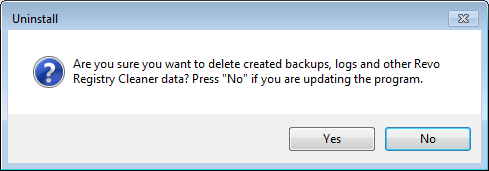
- You will be asked if you wish to delete or preserve Revo Registry Cleaner Pro’s folder in AppData. This folder contains any created trace logs, backups, and other miscellaneous data. If you want to uninstall Revo Registry Cleaner Pro permanently, or you want to make a complete and clean removal of it in order to troubleshoot a problem, then click Yes, which will delete the folder.Otherwise, if you plan to install Revo Registry Cleaner Pro at a later time, or you are simply updating it, click No.

- Regardless which option you choose, the uninstallation will begin. It cannot be cancelled at this point.

- An information message will appear after the uninstallation has been completed. Simply click OK.

To Know
A reboot of your computer may be necessary in certain cases. If it is, you will be asked at the end of the uninstallation. It is generally preferable to reboot then, however you can also decline if you wish to reboot later, or if you plan to turn off your computer, instead of rebooting.
