
In some cases when you have trouble connecting to the internet the reason behind it can be your PC’s DNS cache. If you have already tried to clear your browser cache and cookies, you will have to flush your Windows 10 or Windows 11 DNS. In this article, we will discover how to flush DNS on your Windows PC.
First let’s discover what the Windows DNS cache does
DNS stands for Domain Network System. The main role of the DNS is to translate familiar domain names like revouninstaller.com into IP addresses computers use to connect with each other. For example, if you want to connect to google.com, your computer queries a DNS server on the internet to get the corresponding IP address connected to the google.com domain. Windows 10 and Windows 11 store a copy of the information it gets from the DNS server on your PC, so the process can be faster.
When will you have to flush your DNS cache
Most of the systems connected to the internet automatically update the cache and hostnames, you can have problems when the IP address of a webpage changes before the update. If that is the case you can have connectivity issues, with the page failing to load in your browser. When you flush your DNS all the stored information on your PC is removed. This forces your computer to retrieve new data that will solve your connectivity issues.
So how can you flush your DNS on your Windows 10 or Windows 11 PC?
Using Command Prompt
- Open the Start Menu and in the search bar type
cmdand select Run as Administrator. - Copy and paste the following command:
ipconfig /flushdnsand press Enter.
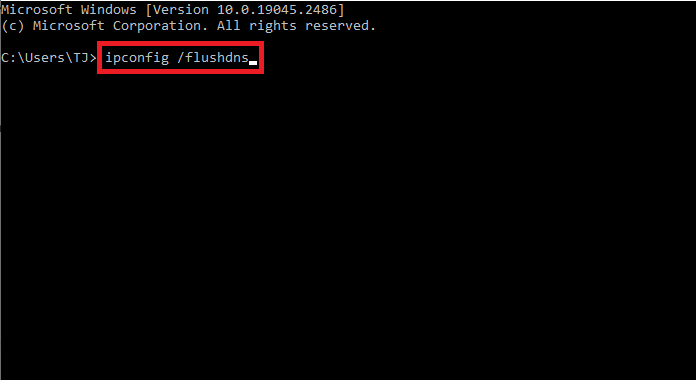

Your Windows 10 or Windows 11 DNS cache should be flushed. You will get a message saying the operation is successful.
- Open the Start Menu and in the search bar type
Using Windows PowerShell
Another way to flush your Windows DNS is by using PowerShell. Here is how to do it:
- Open the Start Menu. In the Search bar type
PowerShelland click Run as administrator. - Copy and paste the following command:
ipconfig /flushdnsand press Enter. This will clear the DNS cache on your computer.

- Open the Start Menu. In the Search bar type
Using a Run Command
- Press Win Key + R and type the following command:
ipconfig /flushdnsand hit Enter.
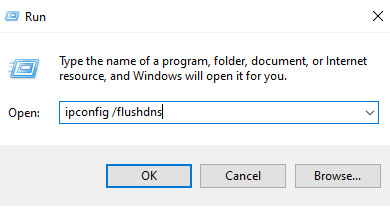
- Your DNS cache should be erased from your Windows 10 or Windows 11 computer.
- Press Win Key + R and type the following command:
Flushing the DNS cache may seem like a lot of technical jargon, but it’s a simple process, as you now know.
In Windows 10 and Windows 11, there are several ways to flush the DNS cache, including using the Command Prompt, PowerShell, and the Run command.
So, go ahead and flush your Windows 11 computer’s cached DNS data to resolve any underlying connectivity issues and improve your privacy.
1 Comment
I have been using Revo Uninstaller for several years, it is the best Uninstaller ever. Revo always solves the problems of leftover files and registry entries.