
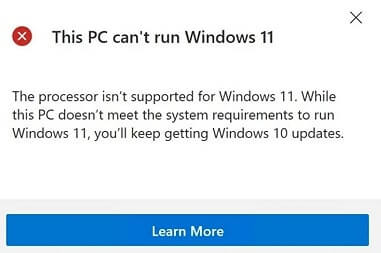
June 24th was the date that Windows 11 was announced. To ease the Windows 10 user’s life, Microsoft provided a tool called PC Health Check. With this tool, the users can check if their computer is compatible with the new operating system. A lot of people were surprised once they ran the software that they received the message “This PC Can’t Run Windows 11”.
If you were one of those users, that means that your current PC is not compatible with Windows 11 and you won’t be able to directly install it.
There are several workarounds and if you follow this guide, we will show you how to fix the “This PC Can’t Run Windows 11” error.
So why are you getting the “This PC Can’t Run Windows 11” error?
When you run PC Health Check and you get the error it is probably because your PC does not meet the minimum system requirements. Check the table below to see if you cover the requirements:
| Processor | 1 gigahertz (GHz) or faster with 2 or more cores on a compatible 64-bit processor or System on a Chip (SoC). |
|---|---|
| RAM | 4 gigabyte (GB). |
| Storage | 64 GB or larger storage device Note: See below under “More information on storage space to keep Windows 11 up-to-date” for more details. |
| System firmware | UEFI, Secure Boot capable. Check here for information on how your PC might be able to meet this requirement. |
| TPM | Trusted Platform Module (TPM) version 2.0. Check here for instructions on how your PC might be enabled to meet this requirement. |
| Graphics card | Compatible with DirectX 12 or later with WDDM 2.0 driver. |
| Display | High definition (720p) display that is greater than 9″ diagonally, 8 bits per colour channel. |
| Internet connection and Microsoft account | Windows 11 Home edition requires internet connectivity and a Microsoft account. |
The majority of requirements are not so different from the Windows 10 ones and most computers can meet them. The problems with the upgrade come from the requirements for UEFI, Secure Boot, and TPM 2.0.
Here is a list of all error messages that you can see when you run PC Health Check. If you encounter one of them, follow the solutions below to fix them:
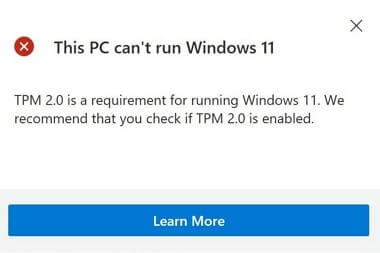
- This PC can’t run Windows 11. TPM 2.0 is a requirement for running Windows 11,+
- This PC can’t run Windows 11. The PC must support Secure Boot.
- This PC can’t run Windows 11. The processor isn’t supported for Windows 11.
Guide 1: How to fix “This PC can’t run Windows 11. TPM 2.0 is a requirement for running Windows 11” error
In this case there are 2 issues:
- Your PC contains a TPM chip, but it is not enabled.
- Your PC does not have a TPM chip and you won’t be able to update to Windows 11.
How to fix the issue:
- Check if your PC supports TPM:
- Step1 – Press Win Key + R. Type tpm.msc in the dialog window, and hit Enter.
- Step 2 – When the TPM utility pops up, check if the chip is in use.
If yes, you’ll see it under the Status section, marked as The TPM is ready to use. - Step 3 – The TPM Manufacturer Information section will provide you with information about the TPM version.
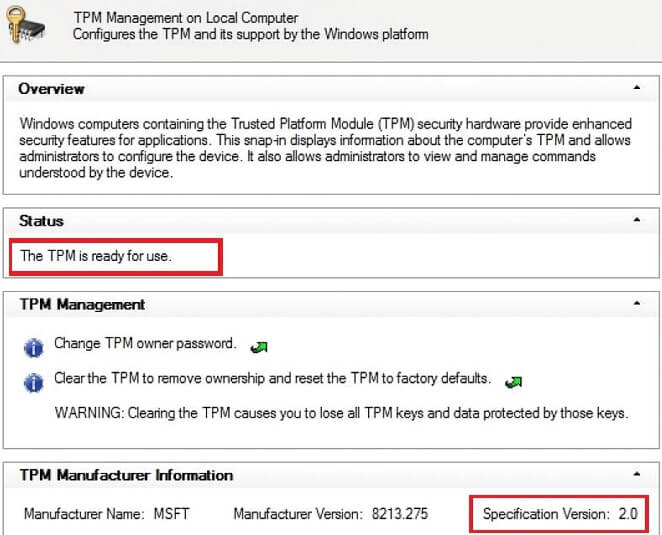
 If it is TPM 2.0, you will be able to install and run Windows 11.If the version of TPM is not 2.0 or if it is lower, that means that you won’t be able to update to Windows 11.
When your computer warns “Compatible TPM cannot be found” or the TPM module version is lower than 2.0, staying with your current computer operating system will be a wise decision.
- Enable TPM 2.0 chip for Windows 11
- Step 1 – Restart your PC and press the F2/F10/Del key to enter your BIOS
- Step 2 – Navigate with your keyboard to the Security section.
- Step 3 – Enable the TMP State
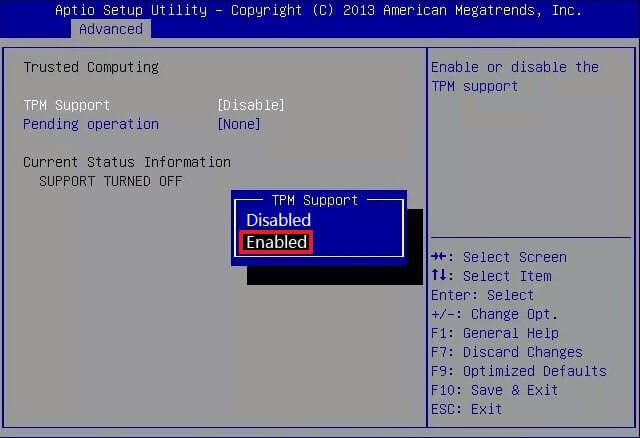
- Step 4 – Hit the F10 key and press Enter to exit the BIOS.Restart your PC and get the Windows 11 update successfully.
Guide 2 – How to fix “This PC can’t run Windows 11. The PC must support Secure Boot” error

Secure Boot mode is usually enabled for most modern computers. Its’ role is to keep your computer safe. In order to update to Windows 11 the Secure Boot mode needs to be enabled.
How to enable Secure Boot:
Check if your system supports Secure Boot
- Press Win Key + R. Type msinfo32.exe, and hit Enter.
- Select System Summary
- On the right-side pane scroll down and try to find a section named Secure Boot State (as shown in the screenshot)
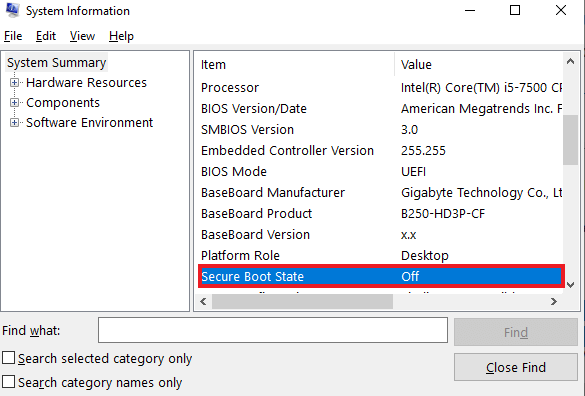 If the Secure Boot State shows as “Off”, that means that your PC support Secure Boot and just follow this guide in order to enable it.If the Secure Boot State shows as “Unsupported”, that means that your computer hardware does not support Secure Boot. To fix this issue you need to check if your PC supports UEFI mode first.
Check if your PC supports UEFI mode
- Restart your PC and press the F2/F10/Del key to enter your BIOS
- Navigate to the Boot Menu. Locate the Boot Mode section and click to see if your computer supports UEFI mode.If you see a UEFI mode, that means that your PC supports this boot mode. If it is currently disabled follow the next steps to enable both UEFI and Secure Mode.Note that, if your computer doesn’t support UEFI mode, you can’t enable Secure Boot and upgrade to Windows 11.
Enable UEFI Mode and Secure Boot
Enable UEFI Mode:
- Restart your PC and press the F2/F10/Del key to enter your BIOS
- Navigate to the Boot Menu. Locate the Boot Mode section and click to see if your computer supports UEFI mode.
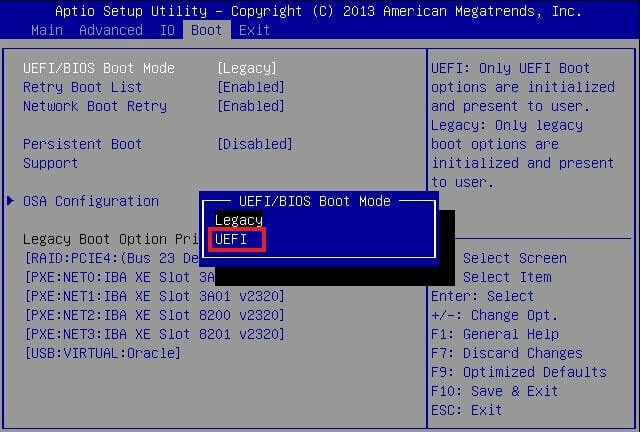
- Select UEFI boot mode and press F10 to Save and Exit your BIOS.
Enable Secure Boot:
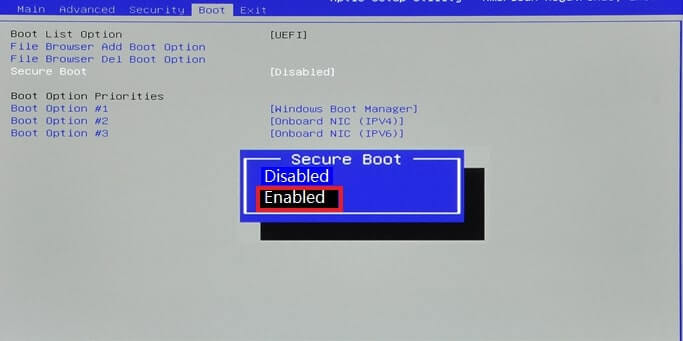
- Restart your PC and re-enter your BIOS settings.
- Navigate to the Boot Menu, select Secure Boot settings and set it to “Enabled”
 Once you enable the UEFI mode and Secure Boot you can continue installing the Windows 100 update on your computer.
Guide 3 – How to fix “This PC can’t run Windows 11. The processor isn’t supported for Windows 11.” error
This error message means that your computer processor is not included in the supported processor list.
We’ve cover this error in a separate article that you can find here
Conclusion
As a new operating system, every user wants to try out its’ new features. However, because there are minimum system requirements, many users receive the “This PC can’t run Windows” error. The most common reason for the message is the lack of secure boot or TPM 2.0.
No Comments