
Wake on Lan is a very neat Windows 10 and Windows 11 feature, that does not get much attention. Used by network administrators for years, this feature allows the user to remotely turn on their PCs. You can use it at home too, to remotely get wake up your PC via the Internet.
First let’s discover what exactly is Wake on LAN in Windows 10/11
As mentioned above Wake on LAN give you the power to turn on/off your computer remotely. By using the Ethernet connector a small “magic” packet is sent to the BIOS. This alters it to turn the PC on. For this feature to be active you need to connect your computer to the router using a wired Ethernet cable.
As smart homes setups become more popular, Wake on LAN can be super handy. You can set up a voice command to turn on your PC using Google Assistant or Alexa.
How to Configure Wake On Lan on Windows 10/11
In order to activate Wake On LAN feature on your Windows 10/11 PC, do the following:
First, you will need to active Wake On LAN from the BIOS menu:
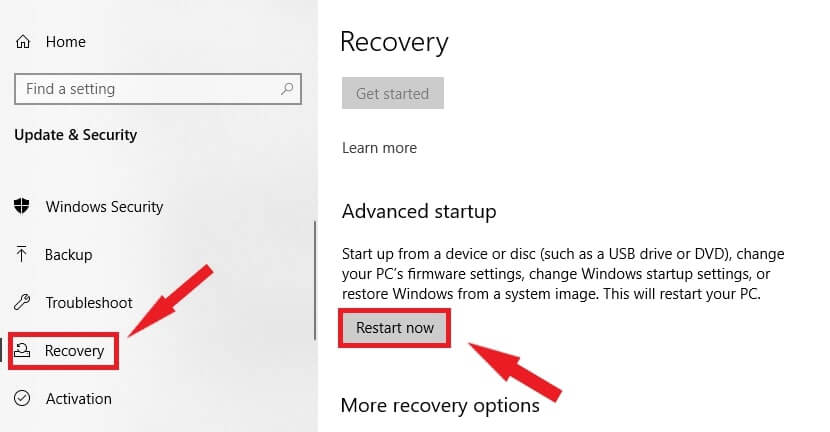
- Open the Start Menu and click on PC settings
- Navigate to Update & Security and click on Windows Update
- Click on Recovery
- Locate the advanced startup option. Click on Restart Now button next to the advanced startup option

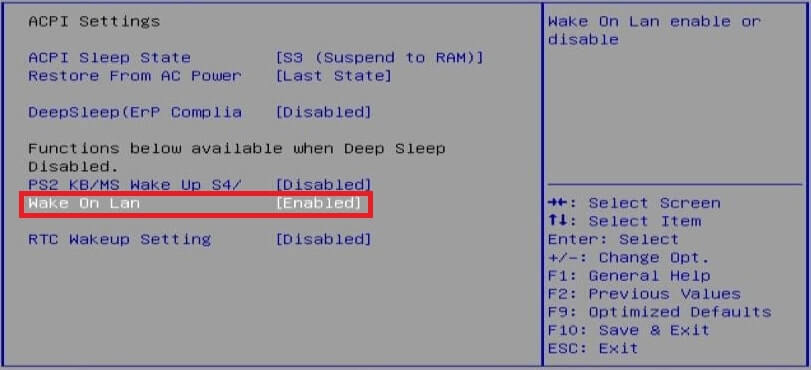
- Your computer will restart. Select troubleshoot. Next, select advanced options, and then select the UEFI Firmware Settings.
- Select the Restart option, and you will be headed to the BIOS.
- In the BIOS, head to the power settings section.
- Here you will find Wake On LAN option. Enable it
Once we enable Wake on LAN from the BIOS menu we need to configure it
How to configure Wake on LAN
In order to configure Wake on LAN in Windows 10/11 do the following:
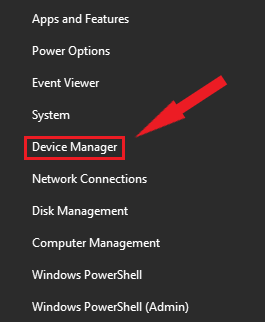
- Press Win Key + X and click Device Manager
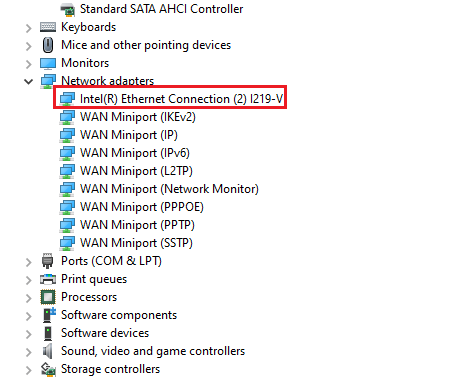
- Expand the Network adapters menu and look for your PCIe/Ethernet controller. Right-click on it and select “Properties”
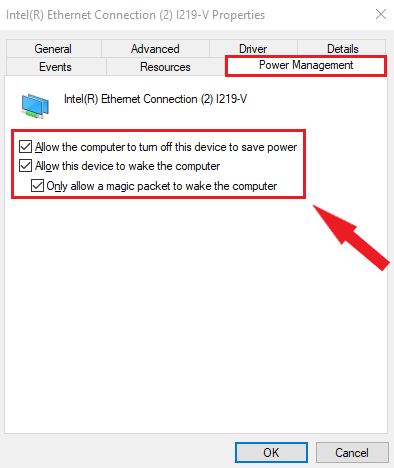
- Navigate to the Power Management tab and enable all the checkboxes. Make sure that the “wake the computer” and “Only allow a magic packet to wake the computer” are checked
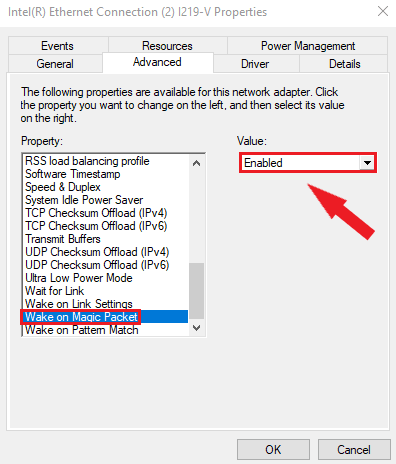
- After that move to the Advanced tab. Scroll down the list of options under the Property windows. Look for the “Wake on Magic Packet” option and enable it from the “Value” drop-down menu. Finally, click OK to save the changes
- Finally, restart your PC to enable the Wake on LAN feature on your Windows 10/11 PC
No Comments